Using a Breadboard
What is a solderless breadboard and why would you want one? Solderless breadboards, or just breadboards for short, are handy little boards that make prototyping easy. You can insert most components as well as add wire to connect these components. Often you will want to make a more permanent version later, but sometimes you want your project to be easily modifiable or maybe your breadboard is just the right size for your project. Either way breadboards make wiring up, testing, fixing, retesting, and using your very own circuits easy and convenient.
 |
 |
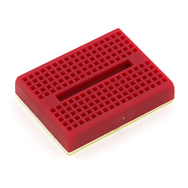
| Image A (basic breadboard with labeled features) | Image B (top of our small breadboard) |
There are many different types of breadboards (see image A), some small (see image B), some large, and some in between. The basic breadboard has 5 different features, not all boards will have these features and some will have more.
- Terminal Strips
- Power Rails
- DIP package support
- Binding Posts
- Not for human consumption
 |
 |
| Image C (bottom of small breadboard with backing removed) | Image D (small circuit with DIP package) |
Terminal Strips - Basically a breadboard consists of rows of holes that you can connect with pieces of wire. There is usually a divide in the middle of the board separating the 2 sides. Each row is basically a strip of metal and when you plug a wire into a hole it makes contact with that strip (see image C) which connects it with everything else you plugged into that strip.
Power Rails - Most breadboards also have rows running down the edges with red and blue (or black) strips running next to them. These are for running power. When you have large circuits, you are commonly going to need power and ground and having them run along the sides of the board is very convenient. Be careful though, because the 2 sides are usually not connected and larger boards often break up the row into 2 parts (great for when some stuff needs 5V and other stuff needs 12V).
DIP package support - See the little blank space in the middle (image D)? This allows you to put DIP (Dual In-line Package) ICs into your board. DIP packages are about 6.25mm wide with various lengths and should fit perfectly over this space. Because each side of the board is separated each pin on the DIP package has its own row for you to connect to.
Binding Posts - Basically these allow you to hook up an external power source. By default the posts are not connected to anything. It is up to you to connect them to the power rails or where ever you need them.
Sample Question:
Why would you want to use a breadboard?
a. To solder components on
b. To test your circuit
c. To insert under your skin
d. To cut your bread and cheese on for lunch
The official answer is 'b' although depending on the breadboard you have 'd' might be useful as well.
Quiz Question - DIP Package Placement
On a breadboard, where do you put a DIP package?